感谢老师回复!上个月一直在准备考试,抱歉没有及时回复。
为了先解决我的问题,我主要参照了第三点。同时看到网上类似的情况,确实一般都是通过裁切的方式统一到同一分辨率的(例如https://blog.csdn.net/gefeng1209/article/details/90414604、https://blog.csdn.net/HuaCode/article/details/89222573 )
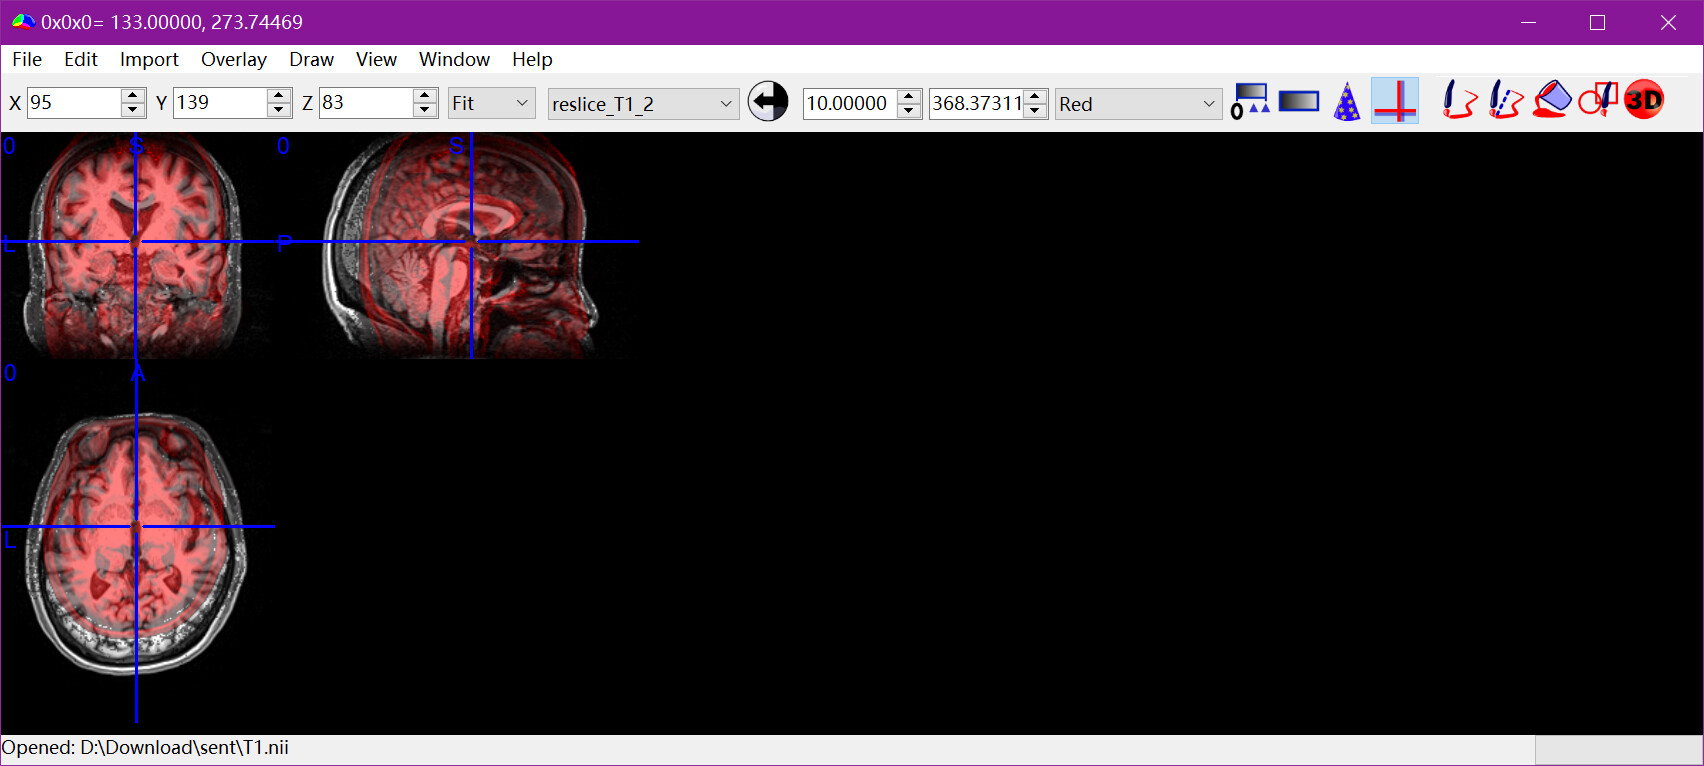
我目前找到的比较简单的解决办法是先裁切/补齐到指定分辨率、得到分割结果、补齐/裁切回原分辨率、对齐和原始图像的中心。目前得到的结果没有发现有什么问题。
import os
import numpy as np
import nibabel as nib
### 裁切/补齐到指定分辨率、得到分割结果、补齐/裁切回原分辨率
def crop_or_pad_image(original_path, cropped_image_path, target_shape):
# Load the NIfTI image
img = nib.load(original_path)
data = img.get_fdata()
affine = img.affine
header = img.header.copy()
current_shape = data.shape
new_data = np.zeros(target_shape, dtype=data.dtype) # Create a zero array with the target shape
# Calculate start indices for slicing
start_idx = [(cs - ts) // 2 if cs > ts else 0 for cs, ts in zip(current_shape, target_shape)]
end_idx = [si + min(ts, cs) for si, ts, cs in zip(start_idx, target_shape, current_shape)]
# Calculate the start and end indices for inserting the crop into the new_data array
new_start_idx = [(ts - min(ts, cs)) // 2 for ts, cs in zip(target_shape, current_shape)]
new_end_idx = [nsi + min(ts, cs) for nsi, ts, cs in zip(new_start_idx, target_shape, current_shape)]
# Crop or pad data
slices_from = tuple(slice(si, ei) for si, ei in zip(start_idx, end_idx))
slices_to = tuple(slice(nsi, nei) for nsi, nei in zip(new_start_idx, new_end_idx))
new_data[slices_to] = data[slices_from]
# Adjust the affine transformation matrix to account for the new data offset
new_affine = affine.copy()
offset_diff = [((nsi - si) * aff if cs > ts else (si - nsi) * aff)
for nsi, si, cs, ts, aff in zip(new_start_idx, start_idx, current_shape, target_shape, np.diag(affine))]
new_affine[:3, 3] += offset_diff
# Save the new NIfTI image
cropped_img = nib.Nifti1Image(new_data, new_affine, header)
nib.save(cropped_img, cropped_image_path)
# Define input and output paths
original_path = r'D:\Download\sent\T1.nii'
cropped_image_path = r'D:\Download\sent\crop_T1.nii'
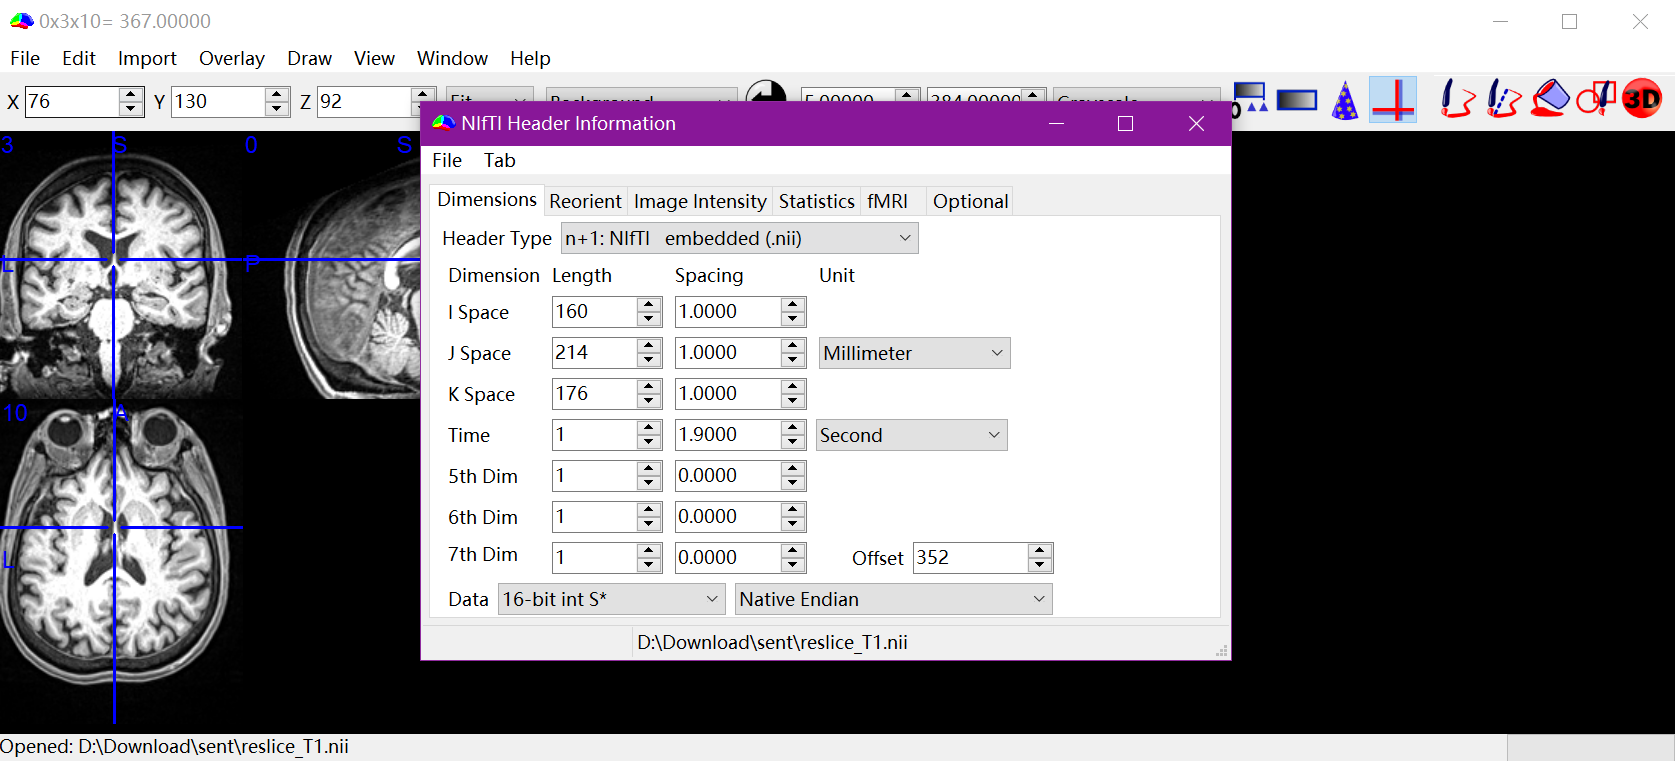
target_shape = (160, 214, 176)
# Crop the image
crop_or_pad_image(original_path, cropped_image_path, target_shape)
# 用crop_T1得到分割结果outimage_v1.nii
# Revert the image back to the original shape
cropped_image_path = r'D:\Download\sent\outimage_v1.nii'
output_path = r'D:\Download\sent\reverted_outimage_v1.nii'
original_shape = (192, 256, 160)
crop_or_pad_image(cropped_image_path, output_path, original_shape)
### 对齐和原始图像的中心
def update_translation_for_alignment(original_path, adjusted_path, output_path):
original_img = nib.load(original_path)
adjusted_img = nib.load(adjusted_path)
original_affine = original_img.affine
adjusted_affine = adjusted_img.affine
# Calculate centers of images in voxel indices
original_center = np.array(original_img.shape) / 2
adjusted_center = np.array(adjusted_img.shape) / 2
# Convert voxel indices to physical space using affine matrices
original_center_phys = original_affine.dot(np.append(original_center, 1))[:-1]
adjusted_center_phys = adjusted_affine.dot(np.append(adjusted_center, 1))[:-1]
# Calculate required shift
shift = original_center_phys - adjusted_center_phys
# Update the translation component of the affine matrix
new_affine = adjusted_affine.copy()
new_affine[:3, 3] += shift
# Save the adjusted image with the new affine matrix
new_img = nib.Nifti1Image(adjusted_img.get_fdata(), new_affine, adjusted_img.header)
nib.save(new_img, output_path)
# Define paths
original_path = r'D:\Download\sent\T1.nii'
adjusted_path = r'D:\Download\sent\reverted_outimage_v1.nii'
output_path = r'D:\Download\sent\original_outimage_v1.nii'
# Adjust the image alignment
update_translation_for_alignment(original_path, adjusted_path, output_path)
这里就是AFNI 3dinfo查看发现R-to-L等三个方向的物理位置不一样,对齐中心后就能解决。理论上在裁剪时就控制图像的中心位置不变应当更好。
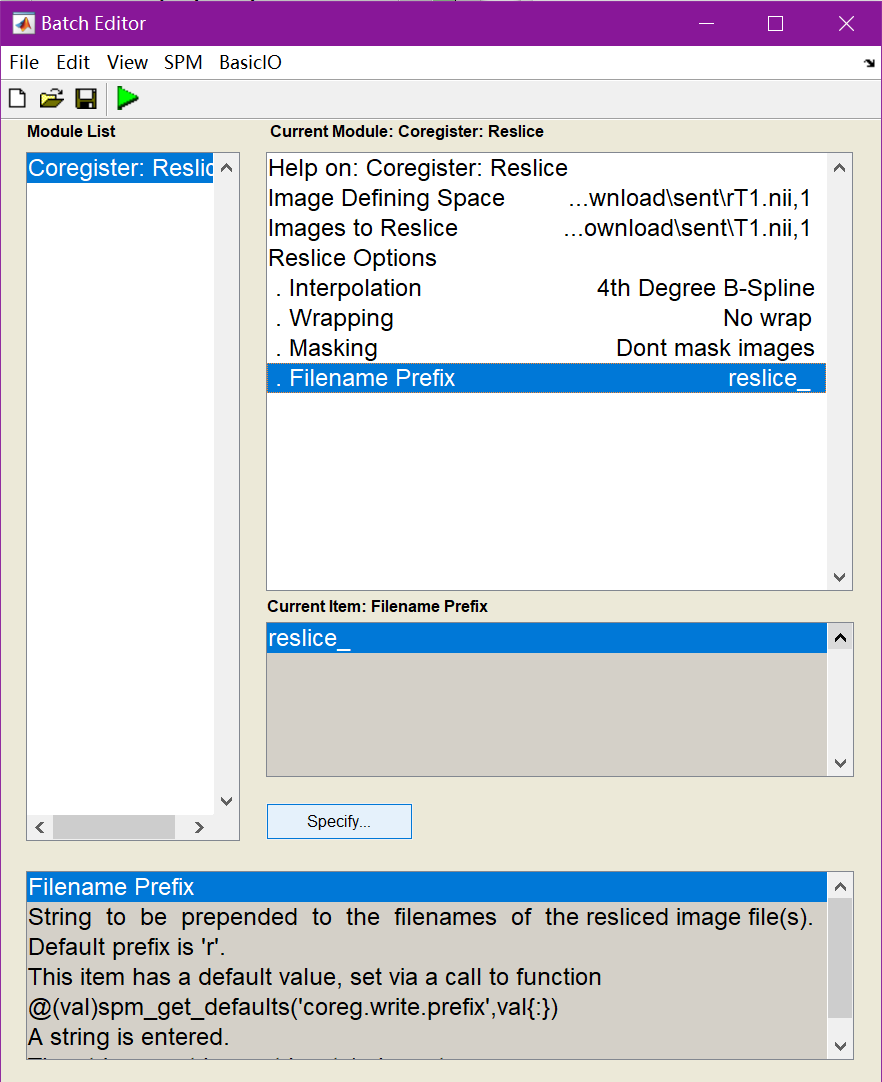
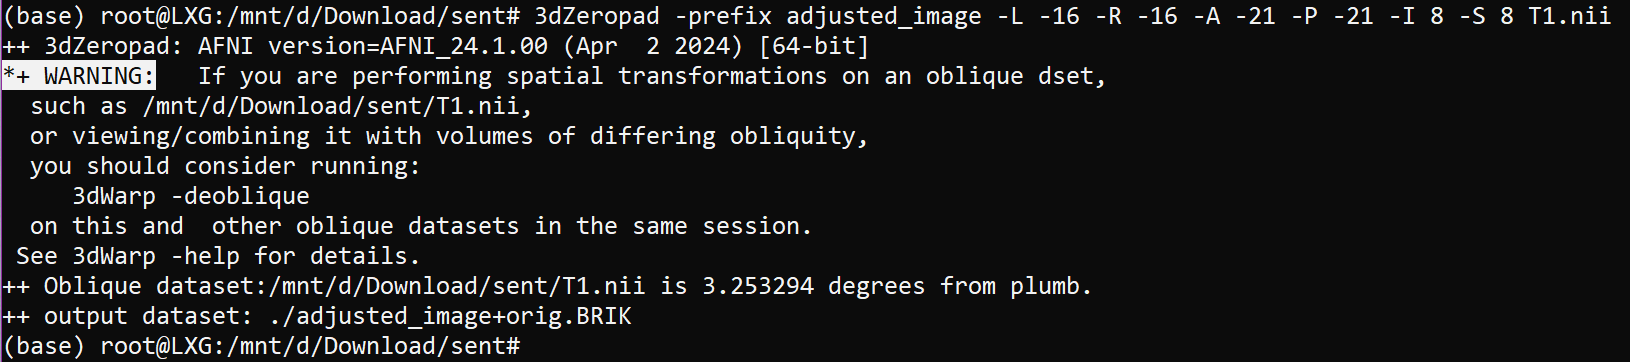
我也尝试了AFNI的3dZeropad
裁剪到指定的分辨率并分割没有问题。但裁剪的这一步会提示图像是倾斜的,而且后续通过对应的逆操作还原分割结果到原来的分辨率后没有办法和原始T1对齐,不知道和这个警告是否有关,暂时放弃了用AFNI。
其它的几条建议还在学习中,再次感谢!